Sunday, June 9, 2019

Pistachio Tres Leches On 9th Blog Anniversary!!!!!

Nine years of blogging, with lots of memories and experiences in my life. Got many friends, well wishers and many many more. only with this platform now I'm an author of my own first cookbook. I had gone through many inspiring people and stories. Thank you each and everyone for the support you all gave me in these years. Your words and comments are my strenght to continue this journey.

To celebrate this I'm posting Pistachio Tres Leches or Pistachio Milk Cake. The very trendy cakes now a days. Made this for this eid day and all liked it very much. Very easy and yummy dessert to treat your loved ones.

Now to the recipe:


Ingredients:

For The Sponge:

6 Eggs
1c All purpose flour
1c Sugar
1/2 tsp Baking Powder
1/2 tsp Vanilla essence
3tbsp Pistachio paste 
1tsp Oil
A pinch of salt
Few drops of green food color

For The Milk:

2tin Evaporated milk
2tins Condensed milk
2c Milk
4tbsp Pistachio paste
Few drops of green food color
1c Whipping cream 
Macarons and crushed pistachios for garnishing (optional)


Method:

Making The Sponge:

1.Soak 1c pistachios in water for half and hour and paste it to fine paste.
2.Beat the eggs and sugar till pale and fluffy.
3.Add the vanilla essence, green color and pistachio paste and beat well.
4.Sieve the dry ingredients and fold in well into the beaten egg mixture.
5.Add the oil and foldin.
6.Grease a cake tin with butter and dust with flour.
7.Pour the prepared sponge batter to the cake tin.
8.Preheat the oven at 200 deg c for 10 mins.
9.Bake the sponge at 180 deg C for 15 to 20 mins or till the tester comes out clean.
10.Cool the cake well and poke few holes on the cake.


Preparing The Milk:

1,Mix the ingredients for the milk. Keep 1c reserve to pour while serving.
2.Pour it all over the cooled cake.
3.Now whip the cream and spread or decorate over the cake.
4.Garnish with crushed pistachios,macarons etc.
5.Keep this refrigerated for few hours or overnight. Overnight is preferred.


6.Cut the cake into pieces and serve with the milk reserved.
7.Enjoy the soft and yummy Pistachio tres leches.

Monday, December 24, 2018

Dynamite Shrimps

A post after a long time. Last 2 months which was busy months with many things happened in my life. One of my dreams to launch a cookbook came true. And to launch it in sharjah book fair was another achievement. My book 'Faji's hotpot Book Of Flavours' is out in a shape, A month with lot of happiness and blessings. 

Thank you each and everyone who supported me in this journey. A special thanks to my family, relatives and friends too.

Today I'm posting dynamite shrimps which is a signature dish of restaurant PF Chang's. I have had it once from them and always wanted to try them. And when I tried my hubby and kids really liked it and got a best compliment too. Loved my version more. Happy with the outcome and it tasted really good.

Wishing You All A Happy Christmas..

Now to the recipe:


Ingredients:

For Marination:

20 to 25 Shrimps
2tbsp All purpose flour
3tbsp Corn flour
1/4tsp Pepper powder
1 Egg
Salt
Oil for frying

For The Sauce:

1/2C Mayonaise
3tbsp Hot sauce
3tbsp Ketchup
2 cloves Garlic chopped
1/2 tsp Chilly powder

For Garnishing:

Lettuce 
Spring Onions


Method:

1.In a bowl mix all the ingredients for marination except shrimps.
2.Once the batter is ready heat the oil in a deep pan.
3.Prepare the sauce by mixing all the ingredient for sauce and keep aside.
4.When the oil is hot coat the shrimps in the flour batter and fry till golden brown.
5.Now mix the fried shrimps with the prepared sauce.


6.Now in a glass arrange 2 lettuce leaves and keep 5 to 6 shrimps on it and garnish with chopped spring onions.
7.Once mixed with sauce serve immediately.
8.Serve hot.

Wednesday, October 10, 2018

Banana Pancake With Chocolate Chips

My post for the MFB challenge.I really didnt want to miss this challenge this month because the theme for this month is Back To School Ideas.And packing tiffin box is a daily task for me.So posting my kids favourite banana pancake with chocolate chips.The easiest and tastier one.And my little one always needs this to cut in triangular pieces and arranged in the box.This can be served with pancake syrup,chocolate syrup or even can have it as it is.

Now to the recipe:


Ingredients:

1c All purpose flour
1c Oats
1/4c Sugar
3 eggs
2 Bananas
1/2tsp Vanilla essence
1tsp Baking powder
1/4c Milk
A pinch of salt
Butter 
Chocolate chips


Method:

1.In a blender put everything exept butter and chocolate chips.
2.Blend it well.
3.The batter should not be runny.It will be thick flowing batter.


4.Heat a pan apply butter and pour one laddle of batter to it.
5.Sprinkle few chocolate chips on top.
6.Once it is half done flip it and cook the other side also.
7.Do this with rest of the batter.
8.Serve hot with pancake syrup or chocolate syrup.


Checkout what fellow bloggers have on their bolgs...


Monday, September 24, 2018

Jackfruit Cake

Back to blogging after vacation.Getting into normal routine is a lazy task after a long vacation.This vacation was really a good one.Got a good break.
Today I'm posting another recipe for jackfruit lovers.This cake has a little fudgy texture.My first attemt to make jackfruit cake and all really liked it.

Now to the recipe:


Ingredients:

2c All purpose flour
1tsp Baking powder
1tsp Baking soda
2eggs
1c Jackfruit puree
1/4c Jackfruit chopped
1c Sugar
A pinch of salt
1 1/2C Oil
1/4c Butter (room temp)
1/2tsp Vanilla essence
Dessicated coconut for topping


Method:

1.Seive the dry ingredients and keep aside.
2.In a bowl mix the wet ingredients except butter and jackfruit puree.
3.To the dry ingredients add the butter and just beat for a while.
4.Now add the wet ingredients to this and beat well.
5.Beat till everything is combined well.
6.Now add the jackfruit puree and mix well.


7.Preheat the oven at 200 deg C for 15 mins.
8.Grease 2 cake pans and pour the batter to the pans.
9.Top the batter with chopped jackfruit pcs and dessicated coconut.
10.Bake this at 180 deg C for 30 mins or till the tester comes out clean.


11.Once baked cool the cake completely before cutting.
12.Cut and serve the cake.

Sunday, July 29, 2018

Red Velvet Macarons

I'm here with a macaron post again.My baking madness of these tiny cuties will never end.Its such an addiction for me to bake these ones.Trying out new flavours is my main obsession now.This post is loaded with pictures 😃😃😃.Have a lot of macaron recipes will be coming up in the blog.While preparing macarons each and every step is important.We have to be very careful in measuring and mixing the macronage.

I was thinking to post this for a special day.Today is my hubby's bday and thought will post this today as red velvet cakes,cookies and baked goodies are mostly made on special occasions.Actually these are just excuses to bakes these😃.Happy Bday Ikka....

Now to the recipe....


Ingredients:

For The Shells:

70grms Egg white
80grms Almond powder
140grms Icing sugar
6grms Cocoa powder
35grms Granulated sugar
1tsp Red gel food color

For Filling:

100grms Butter
1C Icing sugar
6tbsp Cream cheese
1/2tsp Vanilla essence


Method:

Making Shells:

1.Beat the egg whites(room temperature) along with the granulated sugar.
2.Beat till almost stiff peaks appear.
3.Now add the gel color and beat till very stiff peaks.
4.Grind the almond powder,cocoa powder and icing sugar together and sieve it.
5.Add this powder mixture to the beaten egg white.
6.Fold in the powder mixture slowly to the egg white mixture with a spatula.
7.Fold in till you get a thick shiny batter.When the spatula is lifted with the batter thick ribbon like falls down.This batter is called macronage.


8.Line up the baking trays with baking paper.You can even place macaron template under the baking paper to get perfect shaped shells.Once the shells are piped take out the template.
9.Now pour the macronage to a piping bag fitted with a round tip nozzle.
10.Pipe round shapes on the baking paper.
11.Now tap the baking tray on the kitchen counter for few times to knock out the air bubbles.
12.If more bubbles are there prick it with a toothpick slowly.


13.Now resting time for the macs.Let the shells dry for 15 to 30 mins.When touched it should not stick to our finger.
14.Preheat the oven at 150 deg C for 10 to 15 mins.
15.Once the shells are dried bake it at 150 deg C for 15 to 18 mins or till done.
16.After baking let it sit on the tray for 10 mins for cooling.
17.Once the shells are cooled peel it from the baking paper and pair it with same size shells.


18.Now prepare the filling by beating all the ingredients for the filling till it creamy.
19.Pipe out the cream on one shell and place the other shell on top.
20.Refridgerate it for few hours.
21.Enjoy the macarons...

Note:

1.If not filling the shells you can freeze it for later use.
2.It will stay for more than 3 months in the freezer.
3.Before eating just bring them to room temperature.

Wednesday, June 27, 2018

Mango Panna Cotta To Celebrate 8th Blog Anniversary!!!!

A late post to celebrate my 8th blog anniversary.It was on june 7th still I didnt want to miss it.To reach here I'm thankful to all my family,relatives and many many friends.Many well wishers whom I haven't met.Thank you to each and everyone who supported me a lot to reach here.
Today I'm posting Mango pannacota.Mango season is here and a best reason to try out this dessert.


Ingredients:

For Panna Cotta:

1 1/2 C Milk
1 1/2 C Heavy cream
1/2 to 3/4 C Condensed milk or Sugar (as per taste)
1tsp Vanilla essence
3tsp Powder Gelatine
1/4C Water

For Mango Puree:

3 or 4 med Mangoes (I used Alphonso mango)
4 tbsp Sugar 
2tsp Powder Gelatine
1/4C Water

For Garnishing:

Pisthachios 
Mint leaves


Method:

For Panna Cotta:

1.Soak the gelatine in water.
2.In a pan heat the milk and con.milk or sugar till the sugar dissolves.
3.Double boil the gelatine and pour this to the milk mixture.
4.Add the cream and vanilla essence to this and mix well.

For Mango Puree:

1.Soak the gelatine in water.
2.Cut the mangoes and puree it along with sugar.
3.Double boil the gelatine and mix well to this puree.


Assembling The Panna Cotta:

1.Pour the panna cotta into the glasses and keep in fridge for setting.
2.For setting in slanting way keep the glasses in slanting postion and pour the panna cotta.
3.After the panna cotta is just set pour the mango puree on top of this and keep in the fridge for few hours till fully set.
4.Garnish with crushed pisthachios and mint leaves.
5.Serve cool.

Tuesday, May 29, 2018

Aish El Saraya

Hi friends, again after a long break I'm here.Was busy with many things and climate change made me a little sick.Now Alhamdulillah everything fine.
Ramadan Kareem to all.I know its late still half way more to go.
Today I'm posting a lebanese sweet dish which is very easy and yummy one which can be made with a very few ingredients.
As my base stuck to the pan a little bit I served it in glasses still it tatses yum.Otherwise we can cut in pieces and serve.This is a very good dessert after a heavy meal or at the time of iftar also.

Now to the recipe:


Ingredients:

For The Base:

Bread slices to cover the base
1C Sugar
3/4C Water
1 tsp Rose water
1 tsp Lime juice

For the Cream:

1/2ltr Milk
1tin Condensed milk or sugar as per taste
1/2C Fresh cream
5 to 6tbsp Cornflour
2tsp Rose water

Crushed Pisthachios for topping


Method:

For The Base:

1.Remove the sides of the bread slices and toast the bread.
2.Now prepare the sugar syrup by boiling the sugar and water together.
3.Once it is thickened add the lime juice and rose water.
4.Allow it to cool.

For The Cream:

1.In a pan mix milk and cornflour.
2.Add condensed milk and cream to this and heat the milk mixture.
3.Boil it till it is tick and creamy.
4.Now add the rose water to this and mix well.
5.Keep aside till it cools a little bit.


Assembling :

1.Grease a dish arrange the toasted breads as a base.
2.Pour the cooled sugar syrup all over the bread let it sit for 2 mins for the bread to get soaked with the syrup.
3.Now pour the milk mixture over the bread base.
4.Garnish with a lot of crushed pistachios.
5.Set in the fridge for 4 to 5 hrs.
6.Serve cool.


Sunday, February 25, 2018

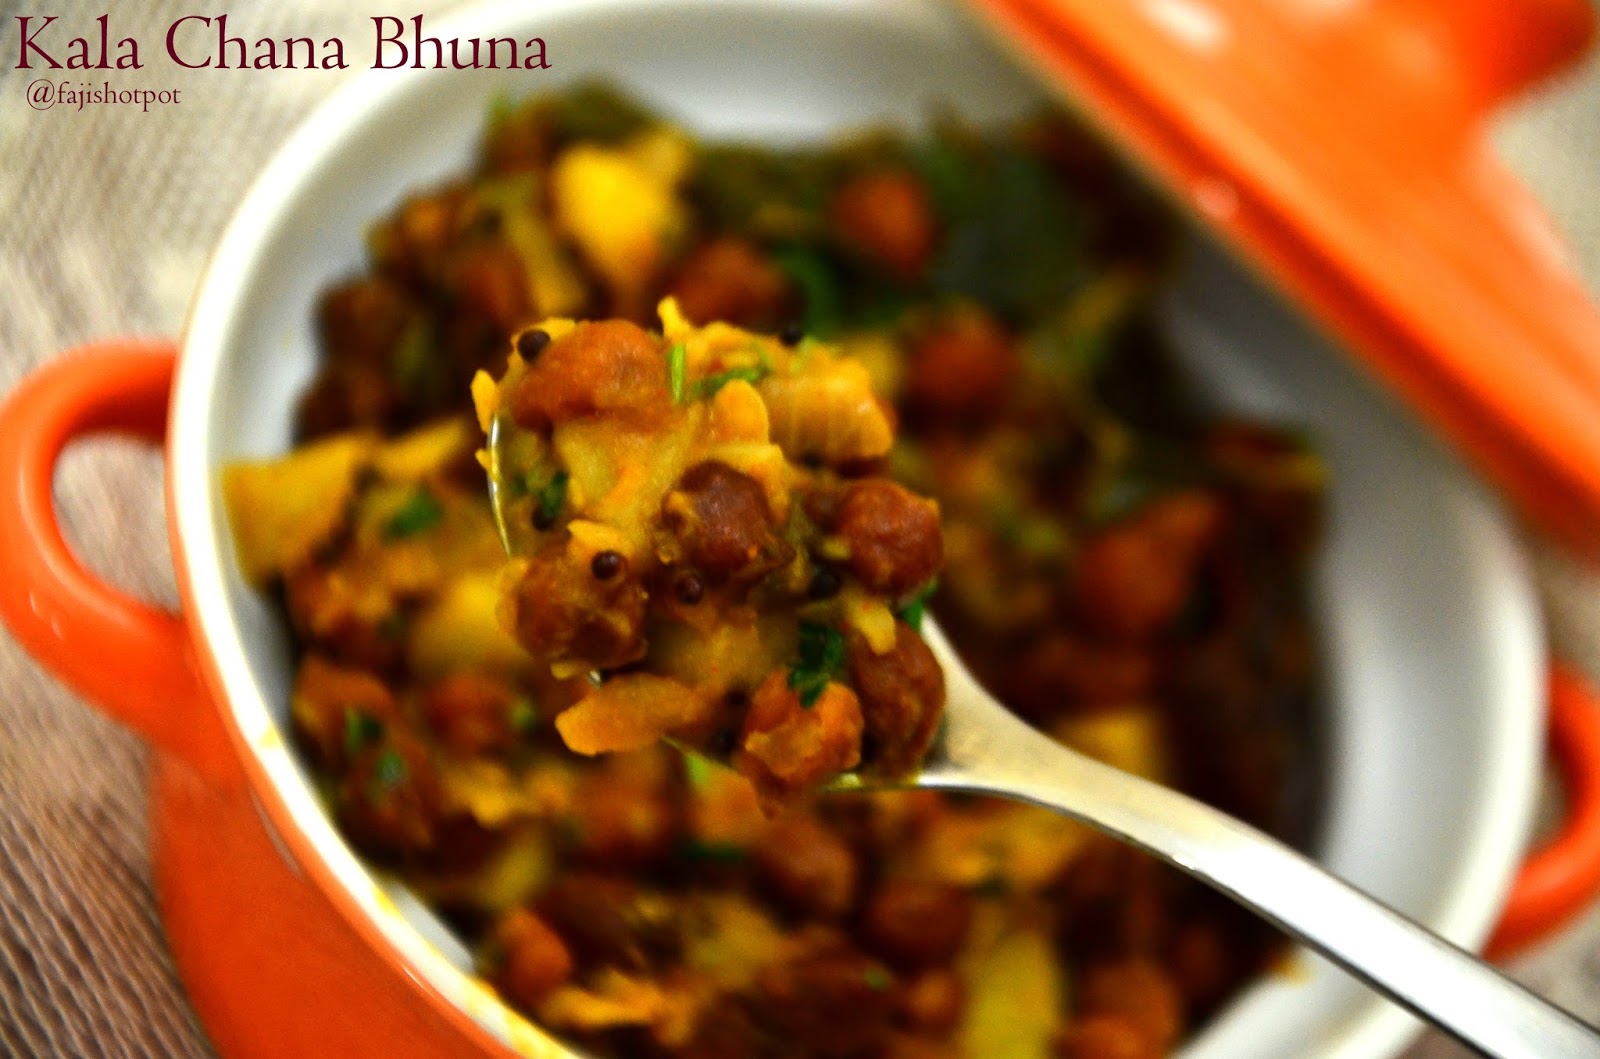
Kala Chana Bhuna

Hi friends this recipe I kept for last month's MFB challenge but couldnt post it.So thought will post it today.
Actually I have a nostalgic feel with this recipe.My dad used to make this during ramadan for iftars.those days we used to enjoy this for iftars as this was my dad's dish.When I was searching for bangladeshi recipes as it was the challenge, saw this and thought will make this.My dad don't use potatoes but in this original one potatoes are used and I cooked with potatoes.I usually cooks this with out potatoes.Very simple and comforting dish.

Now to the recipe:


Ingredients:

1c Cooked black chickpeas(Chana dal)
1large Potato
1large Onion
1 Tomato
2 or 3 Green chillies
1tsp Ginger garlic paste
1/4tsp Turmeric powder
1/2tsp Red chilly powder
1/2tsp Cumin powder
1/2 tps Garam masala powder
Salt
Oil
Mustard seeds
2 pc Bay leaf
Few Dried red chillies
Curry Leaves
Coriander leaves for garnishing


Method:

1.Soak the chickpeas for few hrs or overnight.
2.Once it is soaked well drain the water and wash well.Now pressure cook it with salt and water.
3.Cook it till it is soft.And once cooked well drain the excess water and keep aside.
4.Now in a pan heat oil and splutter the mustard seeds.Add dried red chillies,bay leaves and curry leaves.
5.Now add the chopped onions and saute well.


6.Add the ginger garlic paste,chopped green chillies and saute till the raw smell goes off.
7.Now add the powder spices and mix well.
8.Now add the chopped tomatoes and saute till tomatoes are soft.
9.Now add the diced potatoes.Pour little water and cook till it becomes soft.
10.Once it is soft add the cooked chickpeas and mix well.
11.Heat it till the mixture dries up.
12.Garnish with chopped coriander leaves.
13.Serve hot.
14.Can have it as it is or as a side dish also.


Wednesday, January 10, 2018

Olive Fried Rice

My first post for this year.Monthly MFB challenge which I missed last few months due to some reasons.From this month hoping to be regular with this.
This month the challenge is 'Cooking With Olives'.I thought a lot what to cook with olives because it is always used in salads,toppings for pizza or filling for sandwiches.And after a long list of thinking I ended up with olive fried rice and it tastes very nice.


Ingredients:

2C Cooked basmati rice
1 Onion
1 Capsicum
4 cloves Garlic
2 Eggs
1/2C Cooked chicken
1/2C Olives chopped(blank and green mix)
3tsp Soya sauce
1/2tsp Pepper powder
1/2tsp Garlic powder
2tsp Chopped Parsley
3tsp Chopped Spring onions
Oil
Salt


Method:

1.Marinate the chicken pieces with garlic powder,pepper powder and salt.In a pan pour little oil and shallow fry the marinated chicken and shred this chicken into small pieces and keep aside.
2.Beat the eggs with salt and pepper powder and scramble this eggs and keep aside.
3.Now in large vessel add little oil and add chopped onions and chopped garlic and saute well.
4.Add the chopped capsicum and mix well.
5.Add the chicken pieces and scrambbled eggs to this and mix well.
6.Now add the cooked rice to this and mix weel.
7.Add soya sauce and chopped olives to the rice and mix well.


8.Add the parsley leaves and spring onions and mix well.
9.Serve hot with chilly chicken,garlic chicken or any curries..


Sunday, December 31, 2017

Red Velvet Flan Cake

Hi friends!!! This is my last post for 2017.I know this year I was very slow with my blog.Will try to be regular from next month.'Happy New Year To All'.
Today posting a dessert which is very interesting one.Its a flan cake.A cake and flan in one cake pan.
Posting this to celebrate your new year.
When thought of baking this I was tensed whether the red color will get mixed with the flan and the flan gets the red color, but gave a try.And got the layers the beautiful 2 colors and tasted heavenly.


Ingredients:

1 1/2c All purpose flour
1tsp Baking powder
1 c Granulated sugar
1/2 c Butter room temp
2 Large Eggs room temp
1tsp Vanilla essence
2tbsp Cocoa powder
1/2c Butter Milk(I used yoghurt)
2tbsp Red liquid food color
1tsp Baking soda
1tsp Vinegar

For Flan:

1tin Evaporated milk
1tin Condensed milk
4 Eggs
1tsp Vanilla essence

For Caramel:

1C Sugar


Method:

For Cake:

1.Grease a cake pan or bundt pan .
2.Caramalize the sugar and pour this in the pan.
3.Now prepare the cake batter.
4.
1.Sift flour,baking powder and cocoa powder and keep aside.
5.Mix the red color to the butter milk and keep aside.
6.Now in a bowl put butter and just beat for some seconds.
7.Now add the sugar and beat till sugar is dissolved.
8.Now add egg one at a time and beat well after each addition.
9.Add vanilla essence and mix well.
10.Now add the flour and butter milk mixture alternatively and mix well.
11.Now in a small bowl take vinegar and put the baking soda to the vinegar.
12.When its bubbling pour this to the batter and mix well.
13.Pour this batter to the prepared pan and keep aside.

For Flan:

1.In a blender blend all the ingredients for flan.
2.Pour this over the cake batter evenly.


Baking:

1.Preheat the oven at 200 deg C for 15 mins.
2.Cover the pan with foil.
3.Keep this tin in a large baking tray.
4.Pour boiling water to the large pan.(Braine Marie Method)
5.Bake this at 180 deg C for 1hr or till done.(it took 1 hr and 20 mins for me).


6.Once the cake is done cool it compeletly to room temp.
7.Keep if refrigerated for few hrs or overnight before tilting.
8.This cake is always good the next day of baking.
9.Once cool slice and serve,
10.Enjoy the red velvet flan cake....

Monday, October 30, 2017

Mutta Kappa Biryani

This is an easy dish to make any time.Tapioca is a vegetable which goes very well with fish or meat.This is a mix of egg and tapioca and it taste too good.I saw this in a malayalam movie and thought of trying it out and the result was very tasty.


Ingredients:

1kg Kappa (Tapioca)
5 eggs
2 Onions
2tsp Ginger garlic crushed
4 Green Chilly
1 Tomato
1tsp Coriander powder
1/2tsp Turmeric powder
1tsp Red chili powder
1/2tsp Fennel seed powder
1/2tsp Garam masala powder
Salt
Curry leaves
Coriander leaves


Method:

1. Clean and cut the tapioca and boil with salt and 1/4 tsp turmeric powder in a large vessel.
2. Once cooked drain the excess water.
3. In a pan heat coconut oil add the sliced onions and sauté till transparent.
4. Add the crushed ginger garlic and chopped green chilly.
5. Sauté well and add the powder spices and mix well.


6. Now add the tomatoes and mix well till tomatoes are soft. Add 1/2 cup of water.
7. Let it boil for few mins.
8. Now break the eggs and add to the masala and mix well till it scramble.
9. Now and the cooked tapioca and mix very well.
10. Off the flame and add the curry leaves and coriander leaves.
11. Serve hot.

Tuesday, September 26, 2017

Chicken Tikka Biryani

This is an easy and tasty biryani.This can be made by grilling chicken or frying chicken.This is one of my family fav.


Ingredients:

For Masala:

1kg Chicken
5 Medium sized onions
2tbsp Garlic paste
2tbsp Ginger paste
5 Green chillies
2 Medium sized tomatoes
1 pck Tikka masala powder
4tsp Yoghurt
Oil
Salt if needed more

To Marinate:

2tbsp Tikka masala powder (I used Shan Tikka Masala)
1tbsp yoghurt
1tsp ginger garlic paste
A pinch of tikka color

For Rice:

1kg Rice
3 Pieces of cinnamon stick
7 Pods of cardamom
7 Cloves
Water to boil
1tbsp Lemon juice

For Dum:

Fried onions
Fried cashewnut
Chopped coriander leaves and mint leaves
Saffron soaked in milk
Ghee


Method:

1.Clean the chicken and put some cut here and there on the chicken pieces and marinate the chicken.
2.Keep this for marination atleast 1 hr or overnight.
3.Soak the rice for 30mins.
4.In a big vessel take water in large amount in which the rice has to be cooked.
5.Keep the water for boiling.In this put cinnamon sticks,cardamom,cloves and salt.Drain the rice after 30mins.When the water boils add the rice to it.Add lime juice to this to avoid sticking of rice.
6.The rice should not be over cooked.When it just becomes soft drain the rice.Keep aside.We can make ghee rice also, to lessen the oil and ghee part I always do this method.


7.Now fry the chicken till half done.
8.In a nonstick vessel add oil put the sliced onions and sauté till it becomes brown.
9.After the onions are done add the ginger garlicand green chilly paste.Saute this well.
10.Add the tikka powder and mix well.
11.Add the chopped tomatoes and mix well till the tomatoes become soft.
12.Add yoghurt and mix well.
13.Now add the fried chicken and mix well and cook the chicken till fully done.
14.The masala should not have much gravy.
15.Add some chopped coriander and mint leaves to this curry.
16.Fry 2 onions for garnishing and dum.Fry the cashewnuts.Now time for dum.
17.In a vessel add some ghee and spread at the bottom.Now add half of the boiled rice.On top of this add some coriander and mint leaves and pour 2 or 3 tsp saffron milk and some ghee.
18.Now put the chicken masala over this rice.
19.Now add the rest of rice on top of this and spread evenly.
20.On top of this spread some ghee and pour the rest saffron milk,fried cashew nuts and put the chopped leaves and fried onions.
21.Cover the top of the vessel tightly with aluminium foil and close with the lid tightly as no air escapes.
22.Now on the flame into sim and keep in dum for 20 to 30 mins.
23.When opened,we can feel the steam over the top the correct part of dum.
24.For garnishing we can use boiled egg too.
25. Serve hot with papad,pickles or yoghurt salad.

Related Posts Plugin for WordPress, Blogger...